

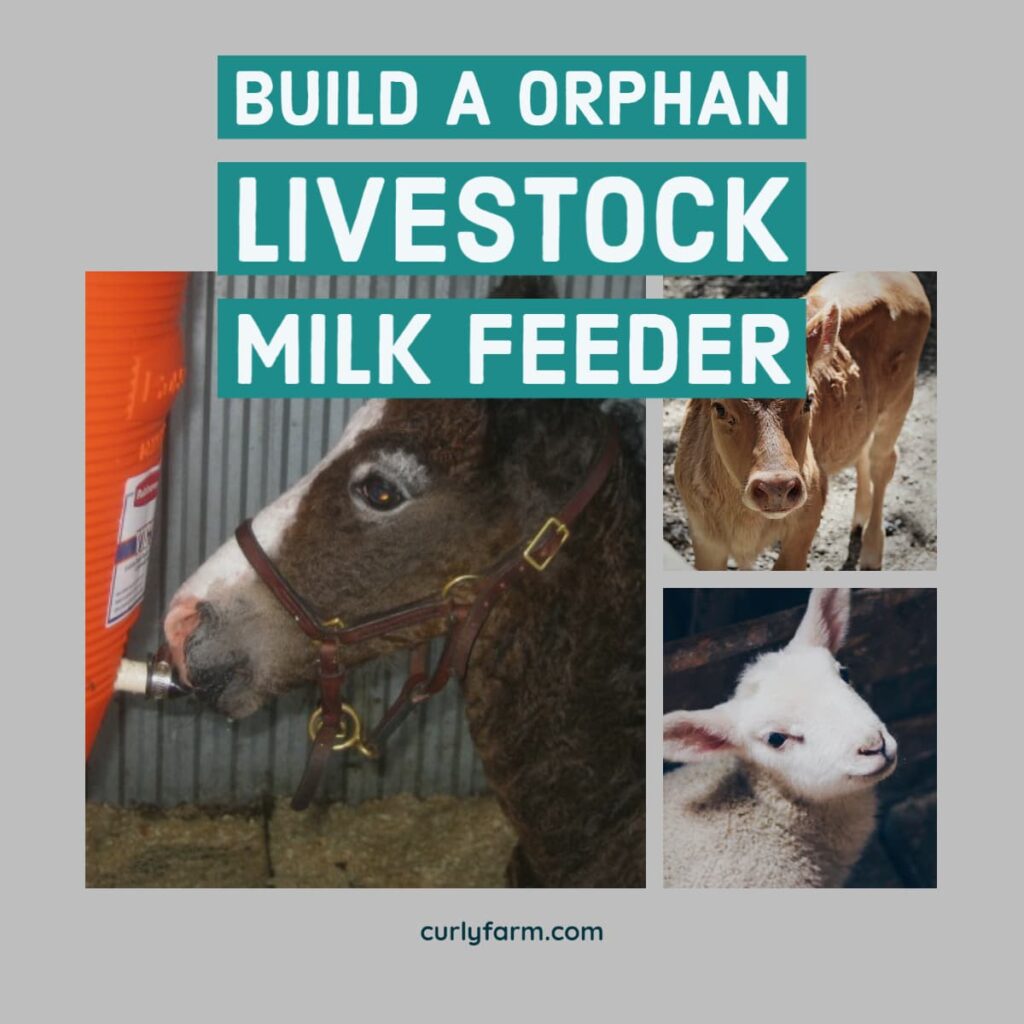
Long before I moved to Seattle I was living on a farm in Missouri and enjoying a childhood dream of raising horses. In the late 2000s, my favorite mare had her first foal- and promptly rejected it. Despite initial blood tests looking good, my foal, unfortunately, didn’t make it past the seventh night.
Even though it was agony to lose the foal, the small bright side is that I’ve been able to help other breeders and horse owners rig up the same orphan feeder that worked great for my foal (who, the vet concluded passed from an infection)
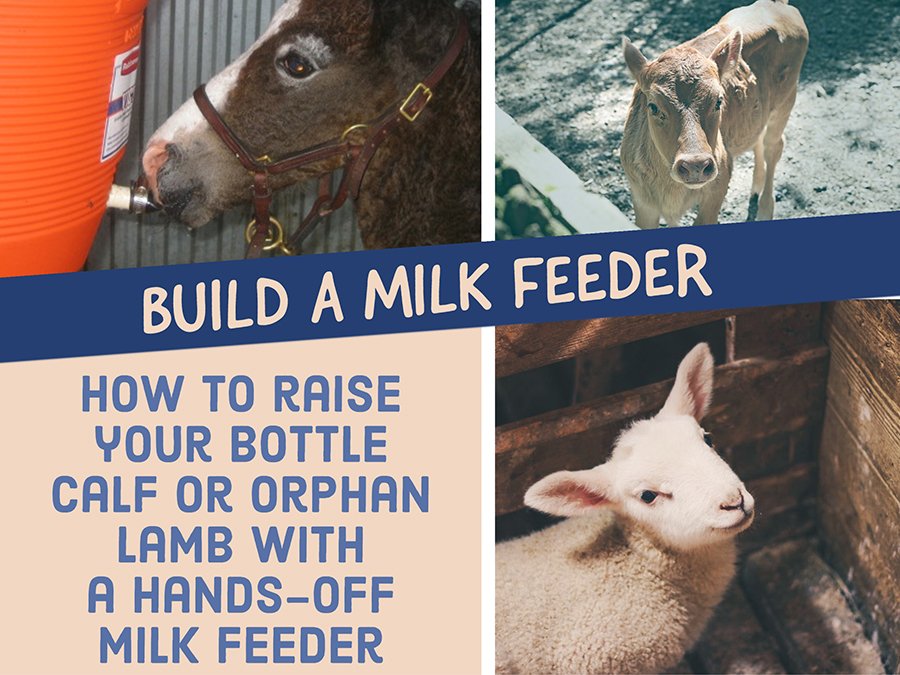
That first foal feeder was a mix of random plumbing parts and pipes that required gluing together, but as I’ve gotten practice helping other people build milk feeders, I’ve got a great, simple instruction list for making a cooler into hands-off livestock orphan feeder. By using insulated parts you can extend the life of your milk replacer and skip most if not all of the late-night and early morning feedings

The following section may contain affiliate links. As an Amazon Associate, we earn from qualifying purchases.
Parts Needed to Build a self-serve Milk Feeder for hands-off Livestock feeding:
- Insulated cooler (any well-insulated cooler that has a 1 inch drain plug, which is somewhat standard, and a securely latching lid – such as drink coolers with screw on tops – will work.)
- Threaded Drain Plug – this model is pretty standard and will work on many coolers to create a lip on the outer edge to which you can attach a nipple.
- Mounting Rack for round drink Coolers (Newborn animals will be rough on the cooler in an attempt to get milk to flow. This will keep round ones put)
- 2-3 nipples (be sure to buy species specific nipples, while many types will work for other species, some – such as using a calf nipple for a foal- will result in a failure to latch on)
- 2-3 Corrosion Resistant Hose Clamps
- 1 brand new toilet brush for easy cleaning between feedings
- 1 bottle brush for cleaning the drain tube
Once you have the parts, building orphan feeder for bottle-fed cabs or orphaned lambs or kids is really easy. I didn’t know this before I had to build my first feeder, but all but the absolute cheapest coolers have drains that can be replaced. Apparently, the drain of a cooler is particularly prone to mold and mildew when not allowed to drive properly, so they need to be replaced more often than you might think- this means that all major cooler vendors have designed their products to have removable and replaceable drains, you don’t even need tools!

To convert your cooler you have to start by removing the existing drain. There should be a way to grip it on both the inside and the outside. Once you have a good hold on it just twist in opposite directions, twisting the outside to the left, and you should feel the drain start to loosen. Untwist and tell the drain separates into two parts.
If you have time, you ou can take this removed drain to a hardware store, hit up the plumbing department and fit the shaft to “female” equivalents until you find a perfect match. Once you’ve found the female counterpart, read the markings on that fitting to get exact dimensions and thread type for your drain piece. With that information, you can then find a threaded pipe and nut to replace your dream with an open outlet extending out about 1 to 2 inches from the side of cooler.
If you find the perfect size, you should be able to screw and the replacement without any glue or Teflon tape necessary. Once your new outlet is installed in your cooler, and you’ve got a short pipe extending out from the cooler, you’re ready to add the nipple. The best way to secure the nipple in place is to use a hose clamp. Simply stretch the nipple over the outlet (occasionally, you may need to use a reducer to make your pipe size smaller to fit the nipple, but this is uncommon). Once the nipple is secured in place, place a hose clamp around the base of the exterior of the nipple and tighten.
Be sure and mount to the cooler at a height equivalent to where the newborn’s mother’s teat would be if they were nursing naturally. Mount to the cooler securely, using tiedowns or snug bungee cords – headbutting calves and nudging newborn lams can get aggressive with their “mother”!
Once your nipple is secured in place, and your feeder is mounted your milk feeder is complete!
Sanitary = Safety
I must add a note on cleaning this cooler. Although this feeding method has so many benefits in reducing the stress on human caregivers and increasing accessibility of nutrition for orphan livestock, it does require more cleaning than an average bucket. Because of the high-fat content of most milk replacers, this orphan feeder requires a little more cleaning.
To speed cleaning, only by as large of a cooler as you need in order to mix a single feeding, clean the bucket with Dawn dish soap followed by a final rinse with very diluted bleach. The feeder is easiest to clean with a multi-sided bucket brush or even just a brand-new toilet brush.
When you clean, don’t skip the spigot! That same place that gathers mildew in coolers used for tailgating weekends, is a potential hiding place for some pretty wicked bacteria if the milk replacer is not cleaned out well. With each and every cleaning, you’ll need to remove the hose clamp, remove and clean (or replace) the nipple, and clean out the outlet with a bottle brush.